


Nope. I refuse to be defeated by the ongoing trainer repair saga.
Two weeks ago I said I would feature a trainer repair the following week. That plan was thwarted by the trainer’s fabric upper being too stiff to be stitched. Then last week I said I had another mending plan in mind and was aiming to include it this week. I was going to glue on a patch and even contacted the brand for advice.
But I can’t tell you about them this week either because the patch would not adhere! I tried all sorts of things including getting the DIY tools out and attempting to clamp that patch in place. It was not to be.
Coincidentally, I heard a few days ago about another sticky solution for trainer repair which I will order. Fingers crossed it will work.
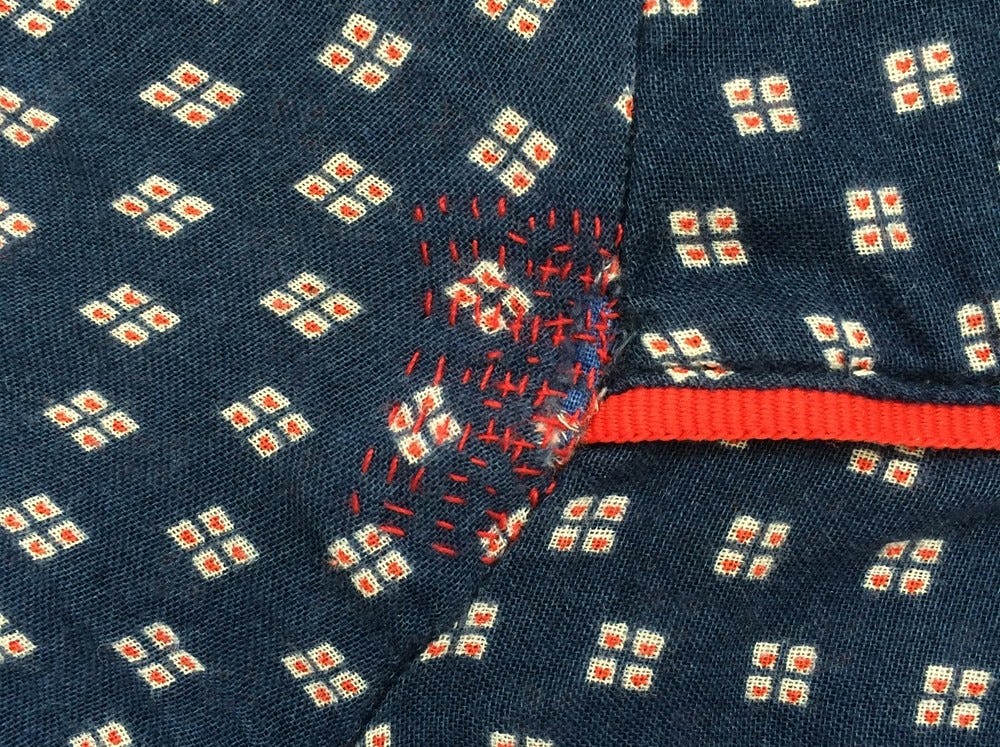
With this exceedingly hot weather in mind, I thought I would instead share another of my sashiko-inspired repairs as it’s a great technique for lighter summer fabrics. This method of patching by hand sewing small stitches is also handy for areas where fabric has thinned or is strained around seams.
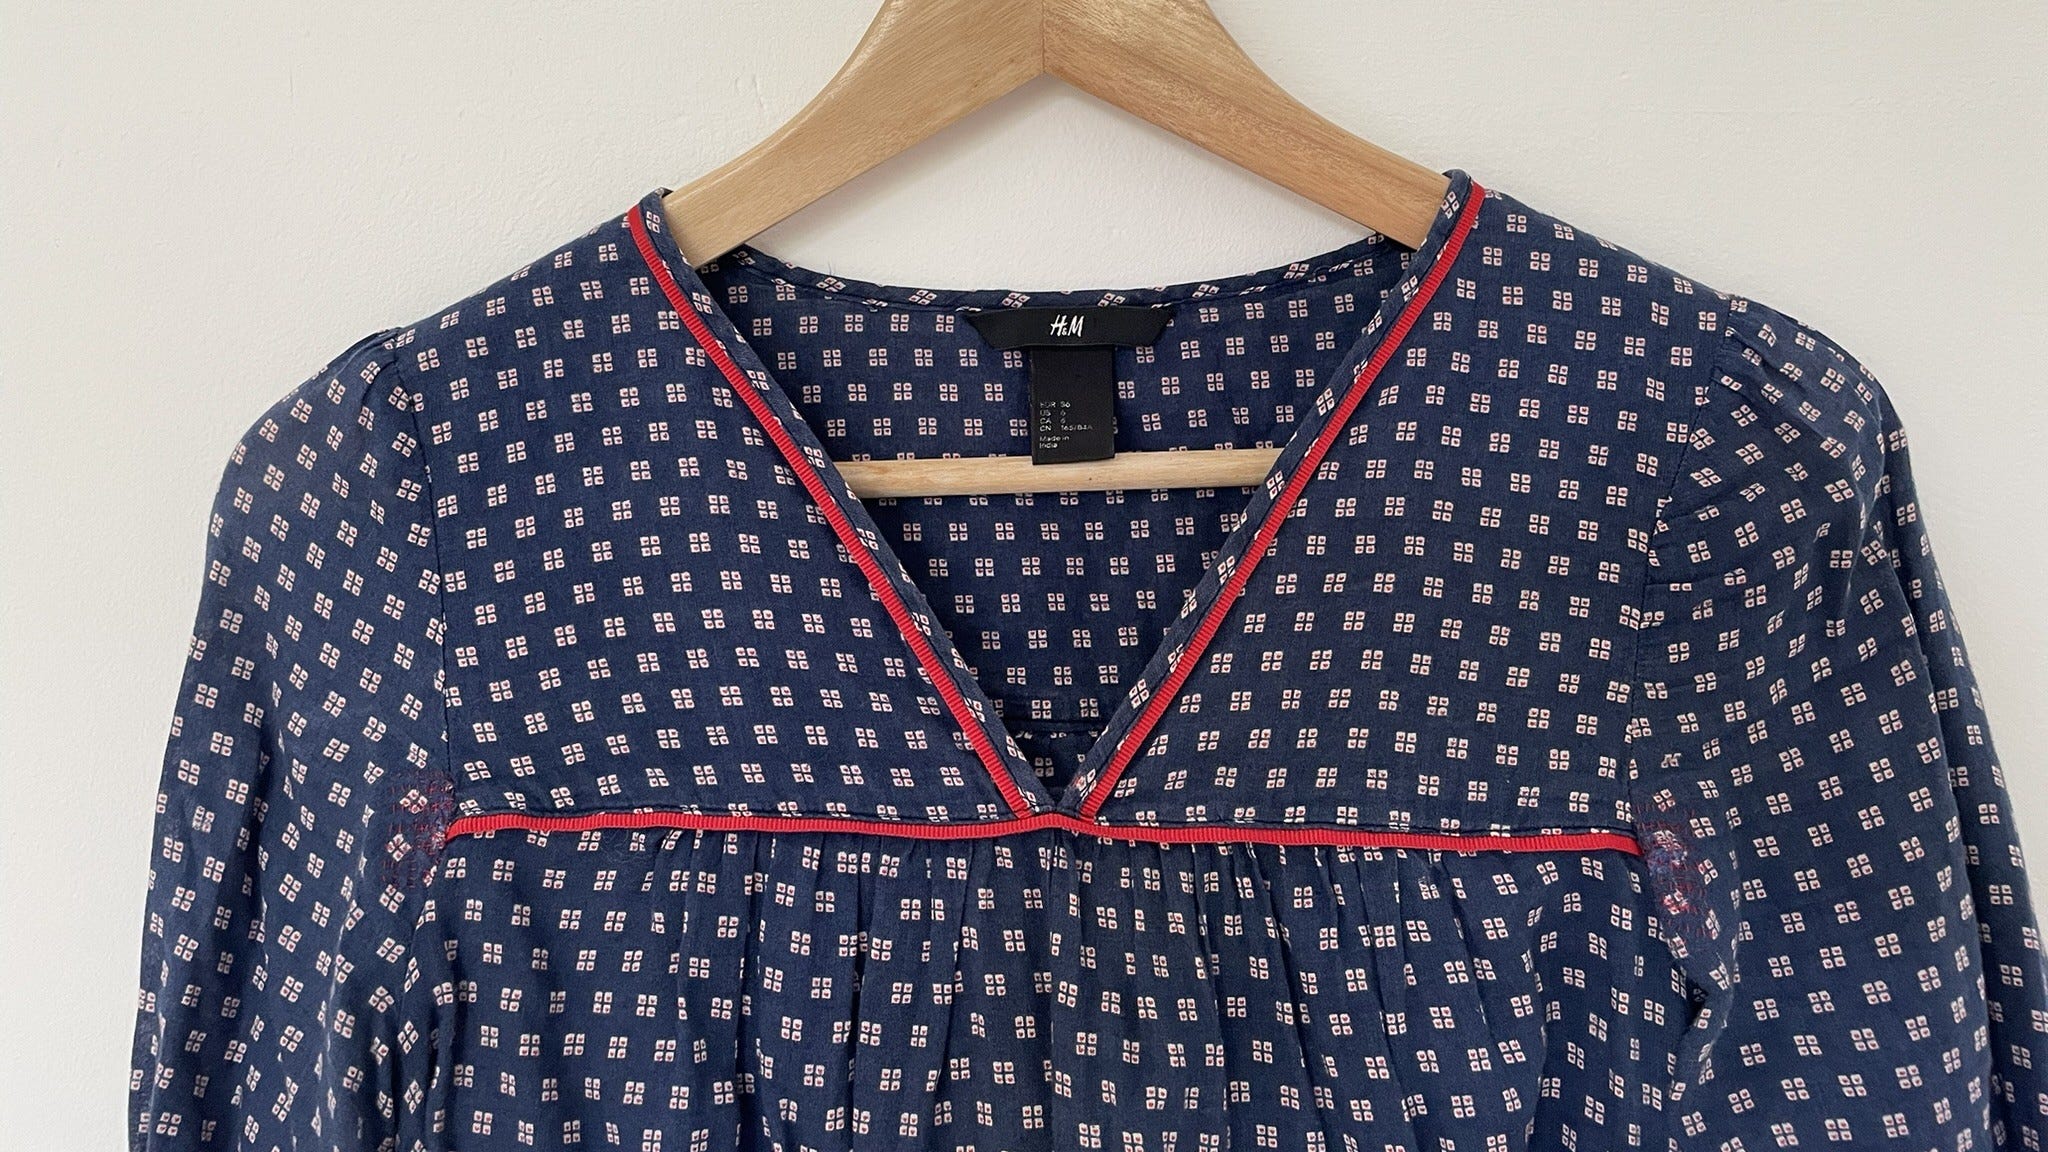
It’s going to be short and sweet today because all this faffing with trainers has left me with less time than usual. I don’t have photos of ‘before’ or the process because they were fairly quick fixes I did some time ago. The fabric is very light and had pulled then torn at the seams in front of each armpit.

How I did this repair:
Cut a rectangle of fabric the same weight as the top
Pinned it on the back of the fabric behind the damage at the side of the vertical red piping
Sewed small stitches vertically in rows to hold the patch in place and hopefully prevent further strain on the fabric
I then removed the pins and stitched horizontally in the area around the hole and where the fabric was weak. You don’t need to do this step if time is short, if there isn’t too much damage, or you would prefer the aesthetic of the rows in one direction.
I repeated these steps for the second patch


I often make my repairs neater than this but sometimes I’m happy with less tidy stitches. They work with the relaxed, loose vibe of the top, are hidden somewhat by the pattern and are quicker to do. It’s a visible mend that doesn’t jump out at you but blends in to the print.
My mending kit for this repair:
Scissors
Pins
Needle
Red thread
Lightweight blue cotton fabric
What’s coming up this week:
My mending pile: I need to hand stitch a loose seam on a summer dress – with this heat I need that dress back in circulation!
What I’m buying this week: I’ll be tracking down some sensible, reliable solutions to repair my trainer
Next week on the mending kit: I’m reluctant to say what I’ll feature next week in case it doesn’t come to pass…
Want to read another sashiko repair post? You can find it here: Sashiko repairs from The Mending Kit.
Thank you for reading The Mending Kit. If you’re enjoying it, please do share it, ‘like’ it, subscribe, or leave a comment below. It really means a lot to get feedback!