

Unconventional mending tools
A visible mend revives my old jeans

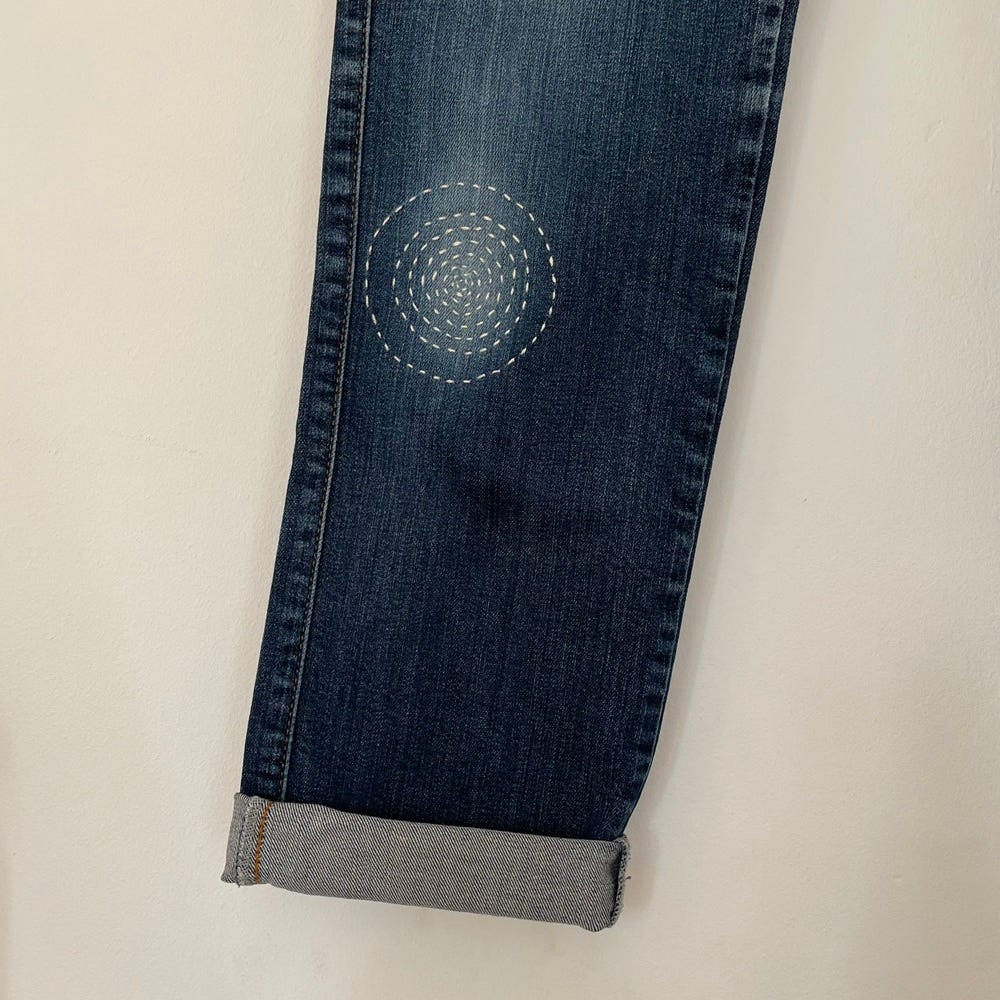
One of the challenges I tend to have with repairs for myself and my family is just getting started. The prep sometimes takes almost as long as the mend itself so I find it a bit tiresome. Commissions are different. Procrastination is not a problem when I’m working on a client’s beloved garment. The accountability helps, as does the purpose and direction I have when I’m repairing an item for someone who’s anticipating its return.
Yesterday, during the England game, with my kids glued to the sofa next to me, I got a boring bit of prep done for this repair. I love/hate watching England play and I need something useful to do with my hands, otherwise I just end up biting my fingers. Having only some of my attention on the game makes it less tense for me too, particularly when my team’s game is not going well.
I’ve done a few sashiko repairs on my jeans in the past, mostly straightforward lines or grid stitching. For these jeans I wanted to do something a little different, plus I want to be able to add to the mend in future as I suspect, over time they will need more attention. They’ve been out of commission for a few months due to the hole in the right knee, but before that I wore them often.


I need to find a better pen or chalk for marking out the lines to sew because the tailors chalk I used wasn’t up to it. I couldn’t go searching around in my kit for something else while the game was on, so I made do with what I had to hand. That included grabbing my son’s plastic cup to use as a template for the two largest circles. The top rim of the cup made the outer circle, and the smaller base of the cup made the second circle. I used my son’s circular smiley face rubber that was next to me for the third, smallest circle. These unconventional templates worked okay, although clearer lines would have resulted in neater, smoother circles. I can’t help looking at the finished stitching and seeing slightly wonky circles.
My mending kit for this repair:
Cotton fabric patch
Fabric scissors
Long needle
Pins
Snips
Pearl embroidery thread


Here’s how I did this repair:
I cut a patch from an off cut in my fabric bag. It was thinner than I might ordinarily use for mending jeans, but last time I did a repair like this I made a patch out of denim and that was really hard to stitch through, so this time I opted for a lighter weight patch.
I pinned the patch to the reverse of the hole
Using pearl embroider thread, I sewed small running stitches on the outer circle
Next, I stitched around the second largest circle, followed by the smaller circle
Using the small circle as a guide, I stitched increasingly small circles around the hole until I’d reached its edges.
When I’d done the small circles, the larger outside ones didn’t look balanced so I decided to stitch an additional circle inside the second largest circle. Then I secured all the loose threads on the inside by looping and knotting them.
Although these have been a trusty pair of jeans over the years because they fit well and work with most things, they’ve never felt special to wear, just okay. Now that I’ve put my stamp on them, they definitely spark joy.


What’s coming up this week:
My mending pile: I’m slow getting through my mending pile and have found a 50s summer dress that needs some work.
Next week on The Mending Kit: Either the trousers I’ve been hoping to feature the last couple of weeks or perhaps some darning.
Want to read some more of my posts about mending denim? You can find them here: Denim repairs from The Mending Kit.
Thank you for reading The Mending Kit. If you’re enjoying it, please do share it, ‘like’ it, subscribe, or leave a comment below. It really means a lot to get feedback!